

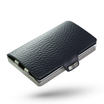
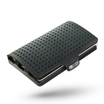
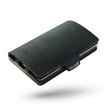
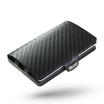




Instructions for the Snap Button Repair Kit
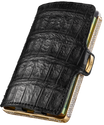
If the snap button on your I-CLIP becomes loose or shows signs of wear over time, we'll gladly send you a matching repair kit free of charge.
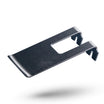
Simply send us a short email with your shipping address to service@i-clip.com, and we'll send the repair kit to you. Each kit includes two I-CLIP caps and two spring fasteners, giving you a spare set in case the replacement doesn't work perfectly on the first attempt.
By repairing your I-CLIP, you extend its lifespan while also contributing to sustainability. Instead of purchasing a new product or sending your I-CLIP in for repair, you can replace the snap button yourself in just a few simple steps. This means your I-CLIP will be ready to use again in no time.
Please follow these instructions carefully to ensure the repair is carried out correctly and that you can continue enjoying your I-CLIP for many years to come.
If you have any questions or need assistance, our customer service team will be happy to help.
If you're satisfied with your I-CLIP and our service, we'd greatly appreciate it if you recommended us to your family, friends, or colleagues.
Thank you for your trust, and enjoy your I-CLIP!
You'll need

Hammer

Cross-head precision screwdriver
Ø 2,5 mm

Side cutters
Super Knips
Remove the old fastener
Place the opened I-CLIP on a firm surface with the cap facing downward.
Grip the edge of the old spring fastener with a pair of side cutters.

Now pull the spring fastener upward to remove it. If it is stuck, gently rock the side cutters back and forth until the fastener comes loose.

Position the new fastener
Place the new I-CLIP cap on a firm wooden surface with the opening facing upward.
Next, position the leather cover on the cap and insert the new spring fastener into the opening. Press the fastener down lightly.
Hold the fastener firmly against the cap using a pair of side cutters, making sure that the opening of the fastener remains fully accessible.
Now insert a Phillips screwdriver (PH0 or PH00, approx. Ø 2.5 mm) straight into the center of the fastener opening.

Install the new fastener
The screwdriver must fit through the opening of the spring fastener, but it must not pass through the opening in the cap.
For this step, we recommend having a second person assist you.

Carefully tap the screwdriver with a hammer. This expands the opening in the cap and permanently rivets the spring fastener to the cap.

While doing so, continue pressing the spring fastener firmly against the cap with the side cutters to ensure both parts are joined as tightly as possible, with minimal play.

Frank explains
In this video, our Managing Director, Frank Mayer, shows you step by step how to replace the snap button on your I-CLIP.
If you still experience any difficulties during installation, our service team will be happy to assist you.
You can reach us by email at service@i-clip.com or by phone at +49 6322 95476-0.
Frequently Asked Questions
Our FAQ page provides clear and informative answers to the most frequently asked questions about our products, services, and company.
You'll find information on topics such as:
- Product Information: Answers to questions about the key features and functions of our products.
- Orders & Shipping: Information on the ordering process, shipping options, delivery times, and shipping costs.
- Payment Methods: Details about accepted payment methods, security measures, and any applicable fees.
- Returns & Exchanges: Information about our return and exchange policy, including return periods, refund procedures, and exceptions.
- Customer Support: Contact details for our customer service team, including email address, phone number, and business hours.
- Product Use & Care: Instructions for proper product use, care recommendations, and solutions to common issues.
- Privacy & Security: Information about our privacy policy, the measures we take to protect your personal data, and answers to questions about data security.
- About the Company: Learn more about our company, its history, values, mission, and general business policies.
The standard I-CLIP holds up to 12 cards and 20 banknotes, while our new I-CLIP MAX model accommodates up to 18 cards and 20 banknotes.
The I-CLIP is available with four different frame materials: plastic, stainless steel, titanium, and gold.
For our covers, we use leather on every I-CLIP, with one exception: our walnut wood version.
Thanks to our I-CLIP with a coin pocket, you can also carry coins securely in your I-CLIP. The integrated pocket keeps them safely in place and prevents them from falling out.
Receipts or sales slips can simply be folded and placed together with your banknotes under the money clip.
All I-CLIP models come with a 12-month warranty, covering any defects in materials or workmanship, or if your I-CLIP becomes damaged during this period.
You can also extend your warranty by an additional year free of charge. Simply scan the QR code on the back of your money clip and follow the instructions to activate the extension.
If your I-CLIP has a defect or has been damaged, please contact our customer service team.
Please describe what is damaged or not working properly and include photos of the issue. This helps us process your request more quickly and efficiently.
You can reach our customer service team at service@i-clip.com.
For deliveries within Germany and internationally, we offer the following payment methods:
- Sofort by Klarna
- PayPal
- Amazon Pay
- Credit Cards (Visa, Mastercard, and American Express)
- Apple Pay
- Google Pay
If you'd like to learn more about our company and its history, simply visit the "About I-CLIP" section in the main navigation. You'll find it between "Catalog" and "Contact".
The I-CLIP is Made in Germany!
Flux Design Products GmbH is headquartered in Bad Dürkheim, located on the German Wine Route in Rhineland-Palatinate. This is where our marketing, sales, and I-CLIP production facilities are all based.
Keeping everything under one roof allows us to maintain close collaboration and ensure that every customer receives a high-quality, carefully inspected product.
Shipping is free on all orders of €28.00 or more within Europe.
For orders up to €27.99, the following shipping rates apply:
- €3.10 for deliveries within Germany.
- €5.95 for deliveries to other EU countries.
Please note that international shipments may be subject to additional taxes (such as VAT on intra-community acquisitions) and/or customs duties. Any such charges are the responsibility of the recipient.
If you have any questions regarding privacy or security, please send us an email at datenschutz@i-clip.com.
You can also find more information and our full Privacy Policy in the footer of our website.
If our FAQ and website haven't answered all of your questions, or if you have any suggestions, feel free to contact us at any time by email at service@i-clip.com.
We'll get back to you as quickly as possible and do our best to find a solution to your question or concern.